
HomeMade PCB by Heat Transfer, written and developed by Luca_004.
HomeMade PCB by Photosensitive Dry Film explained in this link.
Hi guys, in this article I will present the creation and manufacture of a homemade printed circuit board (PCB) with the simplest items at home.
HomeMade PCB Tutorial
Step 1: Create a Layout
With the program of your choice you create a layout for a single-sided circuit board.
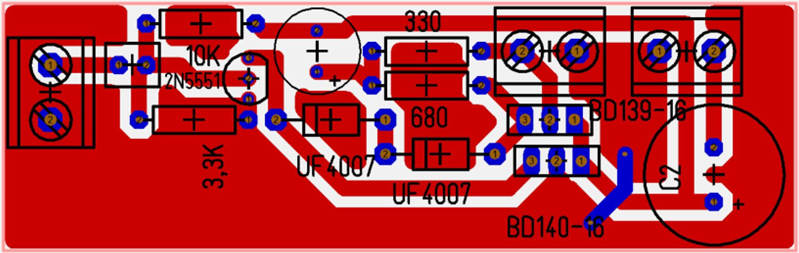
After that, about 70% of the work is done. Now the finished layout has to be printed 1:1 on a transfer paper. This is only possible with a laser printer because the toner consists of plastic and epoxy resin, which can be transferred to a copper circuit board. There is also acid-resistant material which thus protects the copper.
Step 2: Iron the homemade PCB
Now the iron is needed and set to level 2.5. Then you have to wait a moment until it is up to temperature and you can start working.
The circuit board is placed on an old catalog with the transfer paper on top. Then the paper is heated with the iron and light pressure is applied until you notice that you can easily see the layout through the paper. Next wait about 2 minutes while applying light pressure.
After 2 minutes have passed, the homemade PCB is very hot and you can burn yourself. So be careful if you put it on a cold surface, a table is very good for that.
Now we just have to wait until the circuit board has cooled down and you can touch it. Then the paper should simply peel off and the toner should remain on the PCB.
Now that we have our layout on the board, we can fix small mistakes with a waterproof pen.
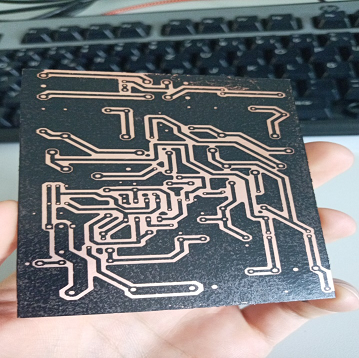
Step 3: Etching
When we are done with the circuit board we can start etching. For this we put some iron 3 chloride in a bowl and plunge the PCB.

After about 30 minutes you should see the results and stir the circuit board with the liquid a little. Next we wait another 15 minutes. Then the board is ready and can be taken out and rinsed under water.
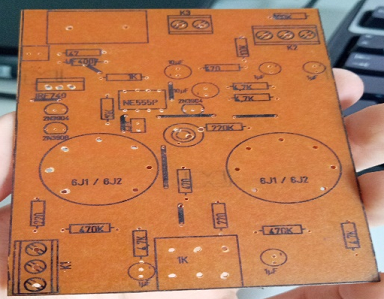
Step 4: Drill
We are almost done now and only have to drill the holes to attach the components to the homemade PCB.
Since I find an assembly print is nice and very helpful when soldering, I added it to the top side of the circuit board. It was printed and ironed as explained before.
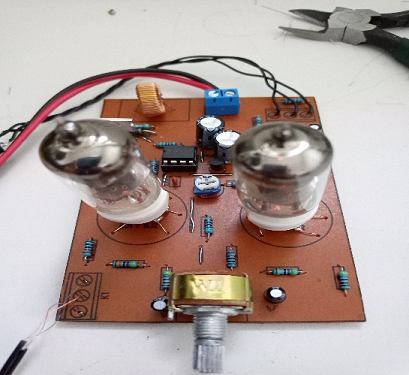
Step 5: Solder Components
Now the homemade PCB is finished and finally the components have to be soldered in. We start with the smallest parts such as resistors and ceramic capacitors. After that is done the next larger parts come until finally every part is installed and you have no more parts left.
HomeMade PCB Video
You can find a video guide on my YouTube channel:
Subscription
If you liked this contribution, feel free to subscribe to our newsletter: