In this entry we change the subject, and we move from electronics to electricity. Or rather, to DIY. We explain how to move a light point externally, without works, obtaining an elegant and stylish result. The expected result can be seen in the cover image of this article.
The text is structured with the following table of contents:
1. Context
It is common that the light points in the ceiling of a room are not in the ideal position. When renovating a house, it is easy to ask the mason to move the light point internally along the ceiling and bring it to the desired position.
However, when no renovation is to be carried out, moving the light point inside is a nuisance, mainly because of the noise, dirt and inconvenience it can generate.
Therefore, it is advisable to analyze other alternatives such as the one explained in this post. If the light point moves externally in an aesthetic way, it can be a more attractive and desirable option than the internal version.
2. Point of Light Movement Strategy
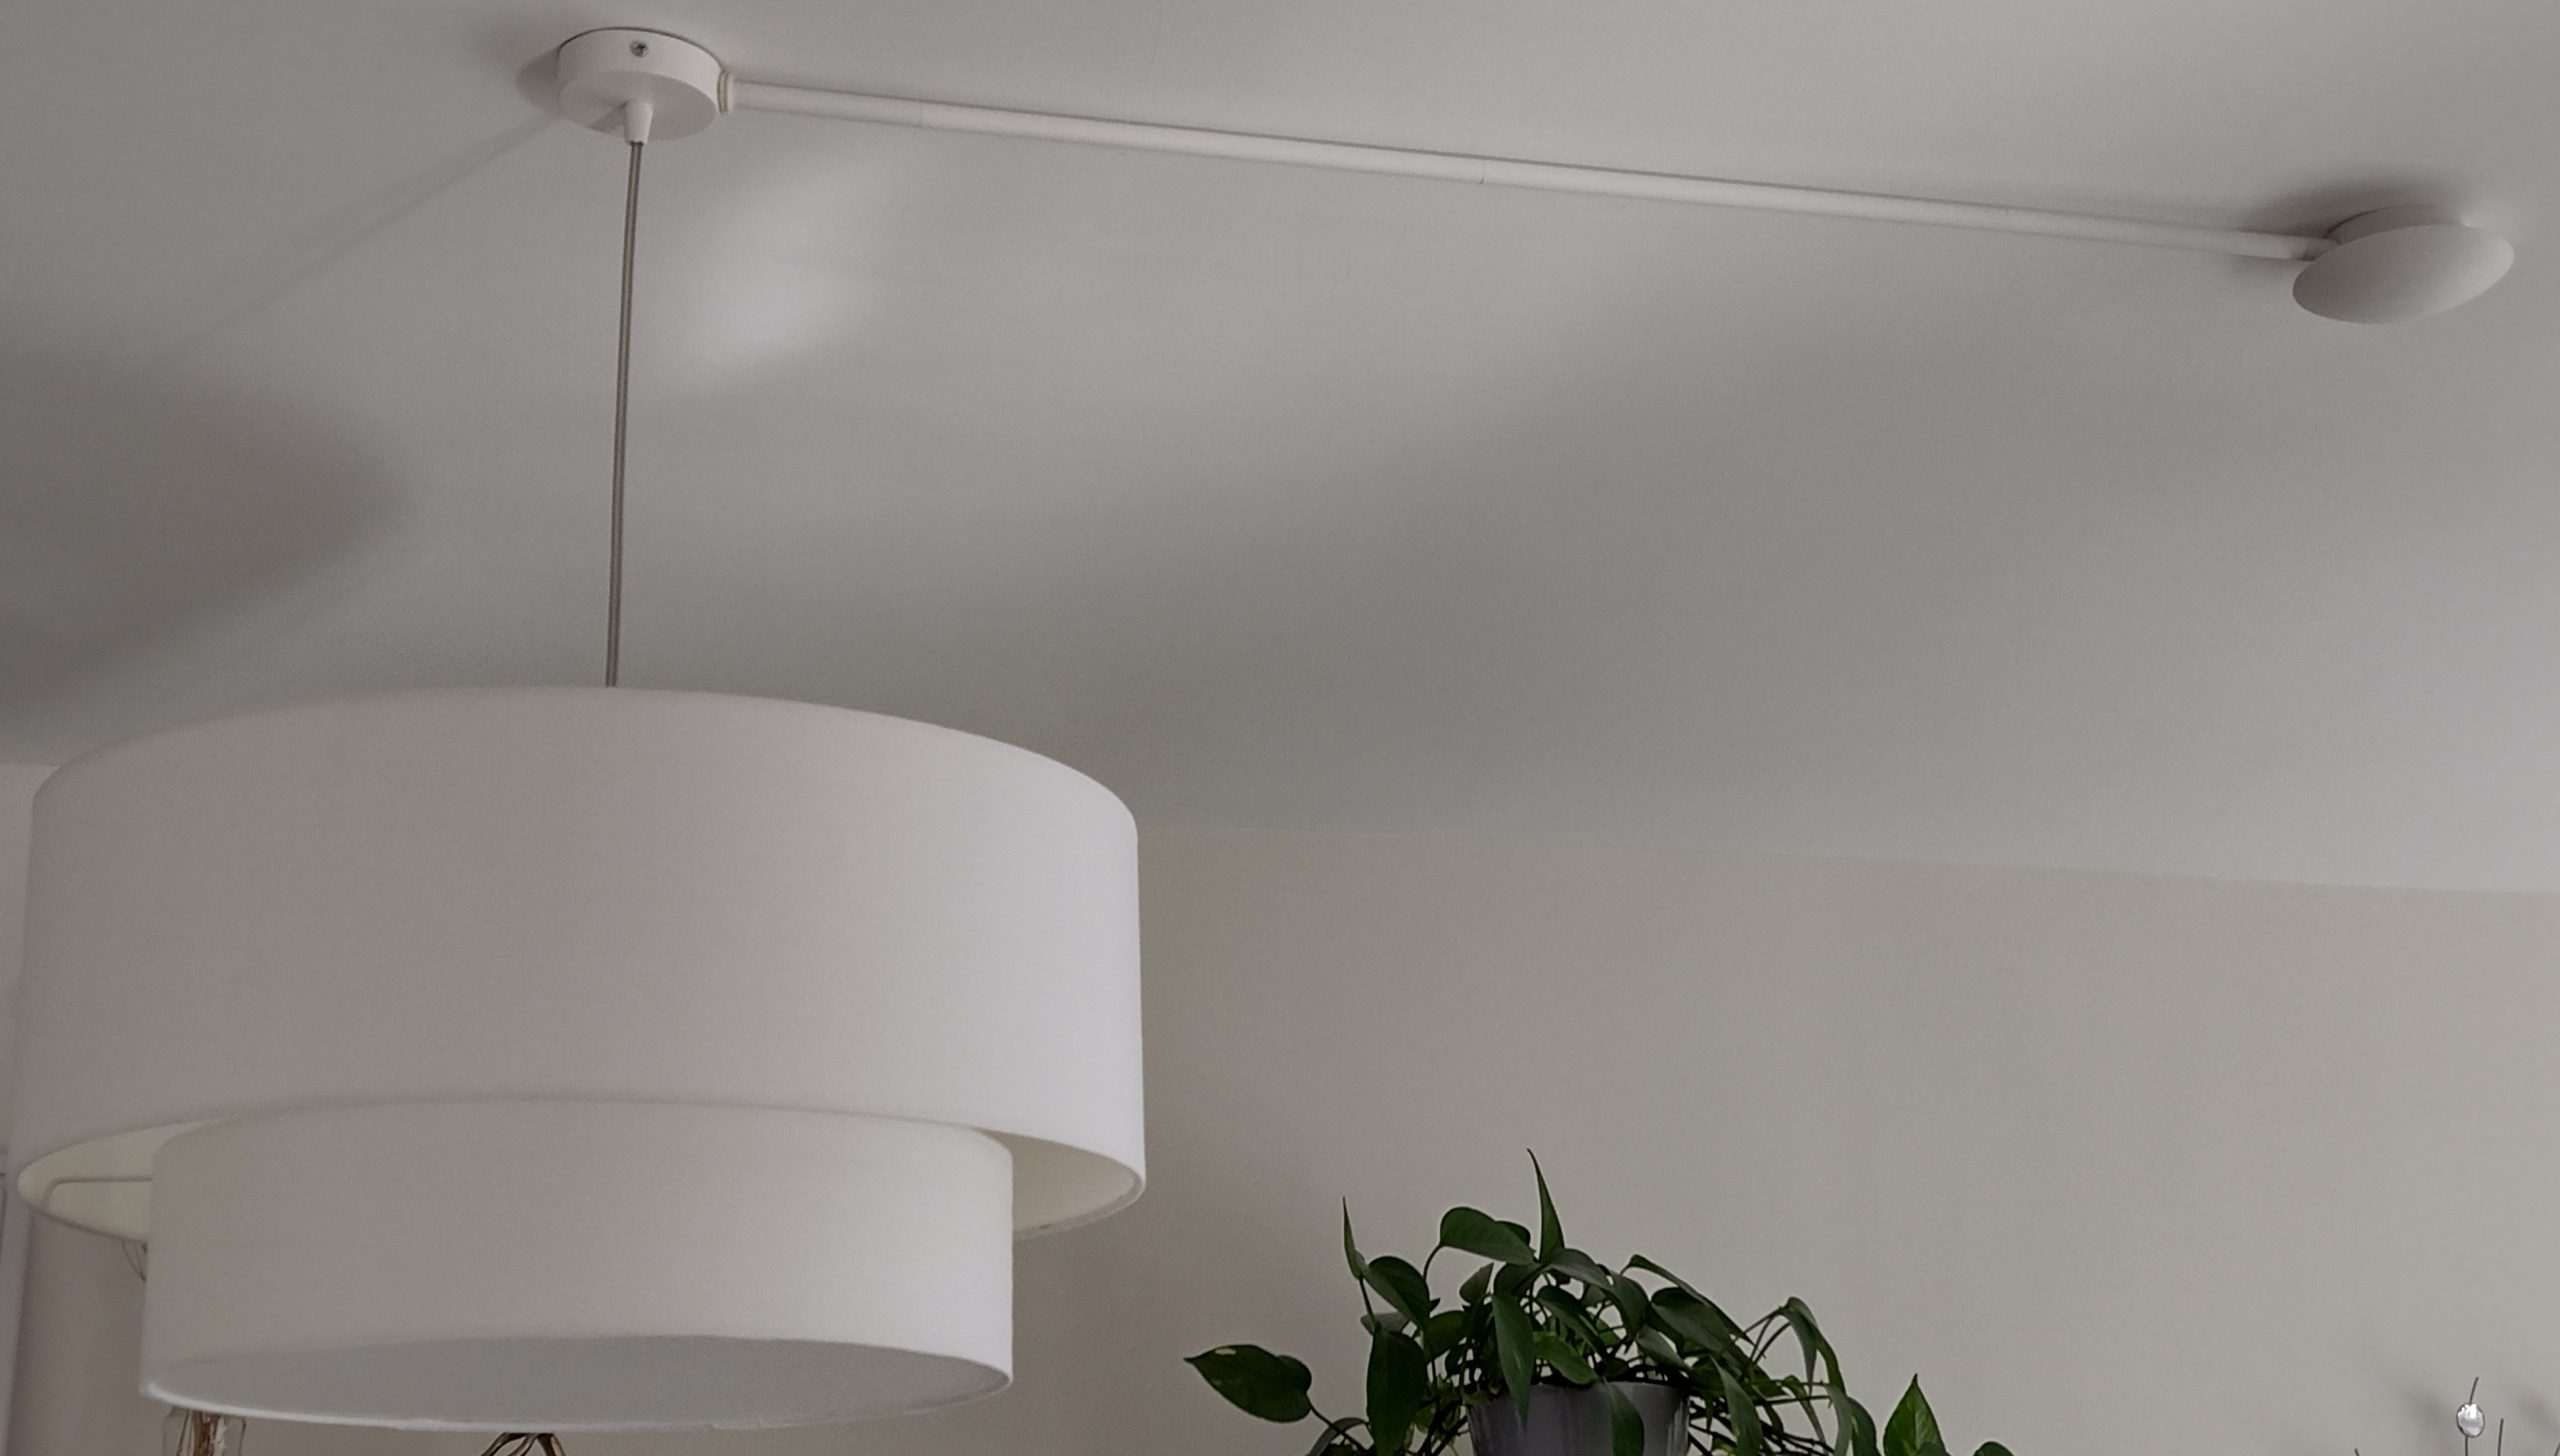
The strategy to be followed in this explanation is conceptually very simple. It is intended to place a trim at the initial location of the light point. And that the external displacement path of the light cable is carried out in an aesthetic way, with a rod of the most suitable and decorative color.
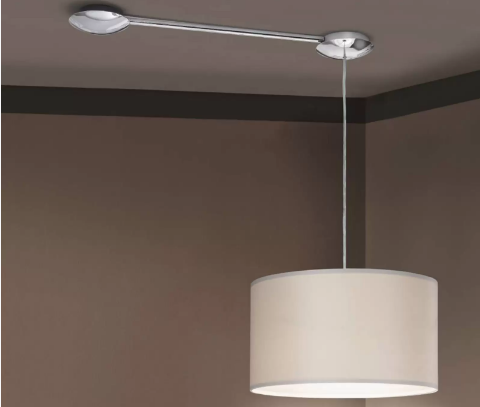
This method is schematically illustrated in the following photo:
At the other end, once the light point has been moved, practically any type of lamp can be placed. Although, as we will see, some kind of action may be necessary for the set to fit perfectly, and the result will be more satisfactory.
3. Lamp Adaptation
For a more aesthetic result, it is advisable to pierce the rosette of the lamp. In this way, the lamp and the rod will appear to form a single element.
As illustrated in the following image:
Making the hole in the rosette can be easy or difficult, depending on the material it is made of. A complicated case can occur if it is made of steel, as it happened in our case. Then a drill as in the next figure can be used:
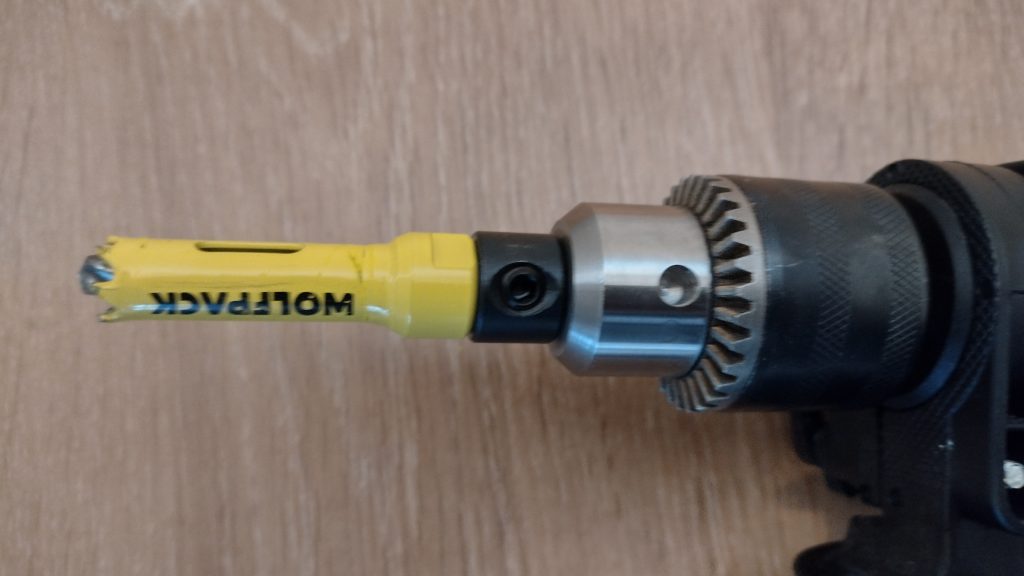
Remember that to drill a hole in steel, low revolutions per minute must be applied.
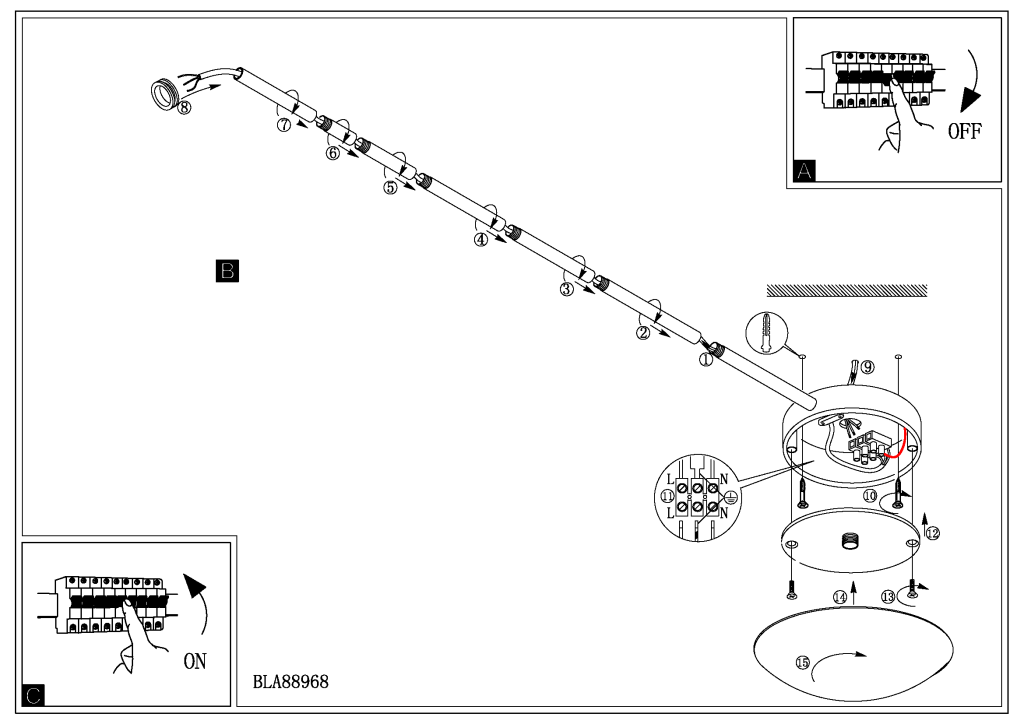
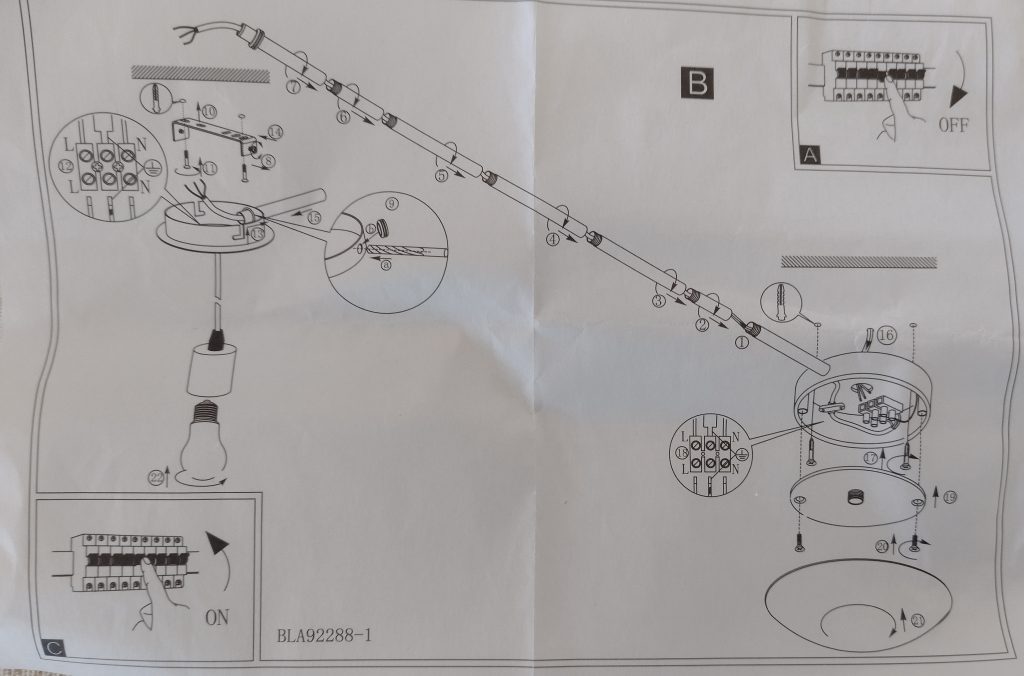
Finally, it is also necessary to concatenate a number of rods to achieve the desired offset distance for the final lamp position:

4. Result: Point of Light Shifted
Finally, after integrating all the parts, the result obtained is as follows:
Subscription
If you liked this contribution, feel free to subscribe to our newsletter: